General Settings #
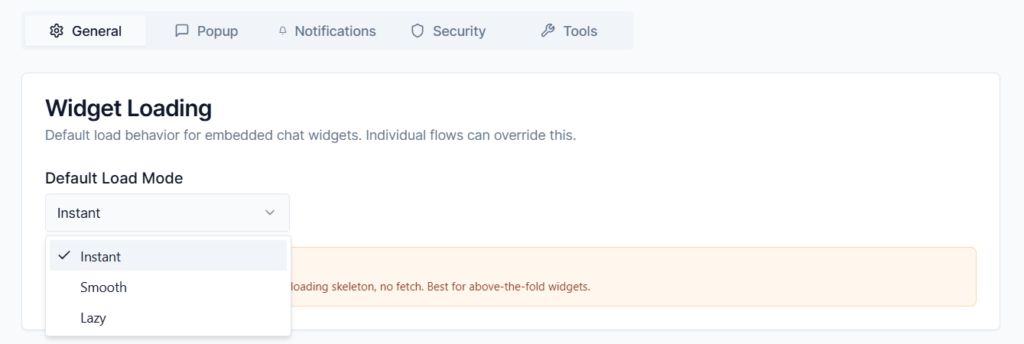
Widget Loading: #
This sets the default load behavior for all embedded chat widgets across your site. Don’t worry, if you have a specific form that needs to behave differently, individual flows can easily override this setting.
- Default Load Mode
Choose how your widgets first appear to visitors from the dropdown menu:- Instant: The form content embeds directly inside your webpage’s core HTML. There is no loading skeleton animation and no background data fetching required. This is the absolute best option for widgets placed above-the-fold (at the very top of your page) because it loads instantly for your visitors.
- Smooth: Loads the widget frame first with a clean placeholder transition, then gently brings in the chat content.
- Lazy: Waits to load the chatbot assets until a visitor actually scrolls down the page near the form container, keeping your initial page speed lightning-fast.
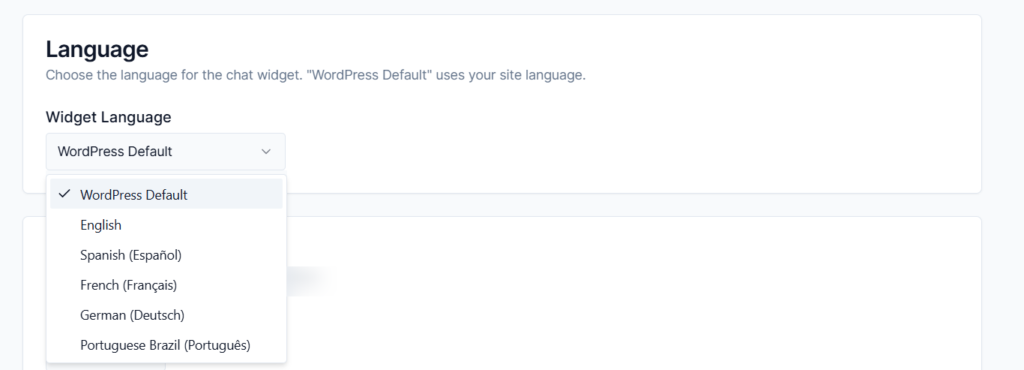
- Language
Select the language you want your forms to use by default from the dropdown menu (e.g., WordPress Default, English, Spanish, etc.)
- Data Rentation
- Keep responses for (days): Choose how long you want to store user submissions on your server. Any responses older than this number will be automatically deleted forever to save database space.
- Collect visitor IP and browser info: Enable the toggle, the system stores the visitor’s IP address, browser type (user agent), and the exact webpage they arrived from (referrer URL) alongside their answers.
- Enable Google Fonts: Allows Formgic to load custom fonts from Google Fonts. Note:
This may have GDPR/privacy implications depending on your region. - Delete data on uninstall: When turned on, completely removes all Formgic data, forms, entries, and settings from your website’s database the moment you delete the plugin.

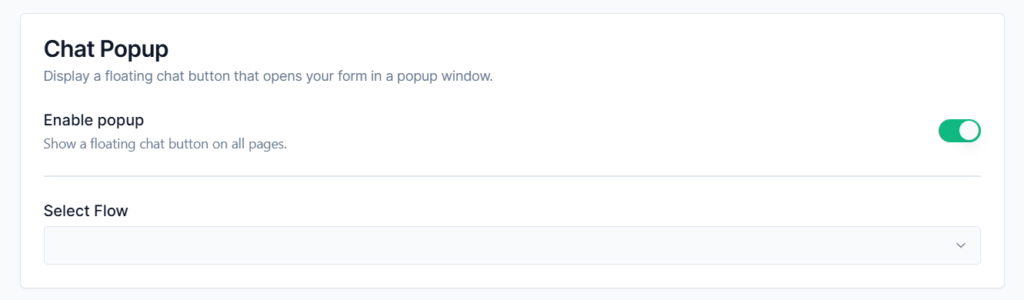
Popup #
Enable Popup: Turning this on will display your floating chat button across all the pages of your website automatically.
Select Flow: Choose the specific conversational form from your dropdown list that you want to open up inside the popup window when a visitor clicks the button.
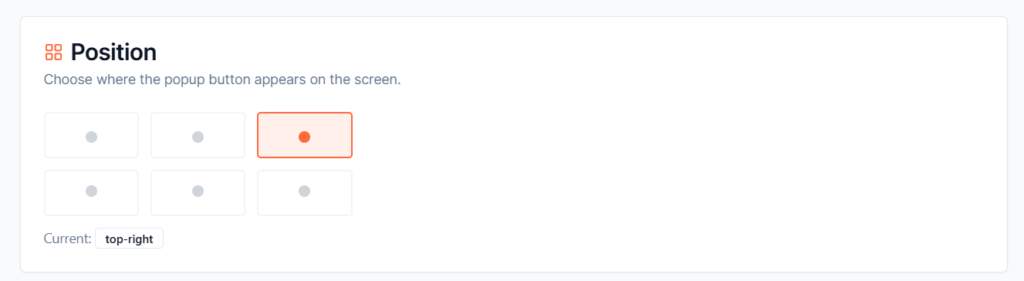
Position #
Choose exactly where the floating chat button sits on your visitor’s screen. You can select from six different screen regions:
- Top Left / Top Center / Top Right
- Bottom Left / Bottom Center / Bottom Right
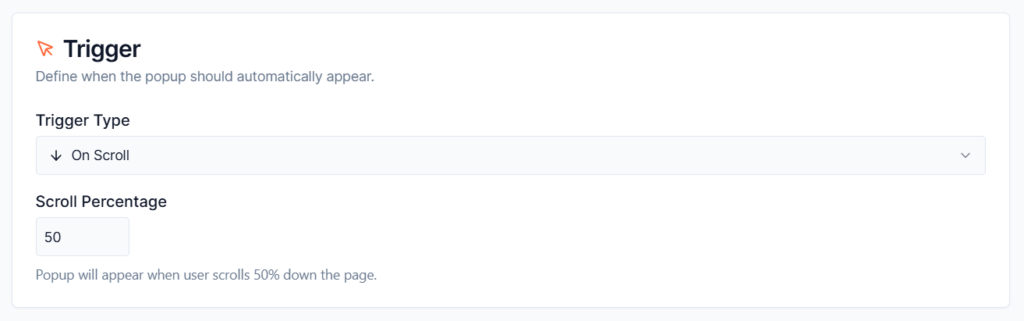
Trigger #
It controls when the chat popup should appear for visitors on your website.
Trigger Type:
- On Page Load: Opens the chat popup automatically after the page loads.
- On Scroll: Opens the popup when the visitor scrolls down the page.
- On Exit Intent: Opens the popup when the visitor is about to leave the website.
- On Element Click: Opens the popup when the visitor clicks a specific button, link, or element on the page.
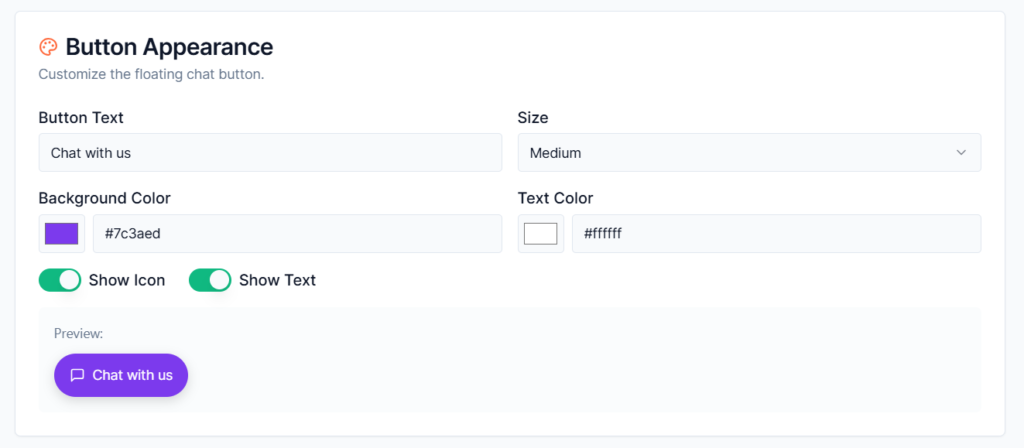
Button Appearance #
The Button Appearance settings control the look and style of the floating chat button.
- Button Text: Set the text displayed inside the floating button.
- Size: Choose the button size from the drop down
- Background Color: Choose the background color for the button.
- Text Color: Choose the text color displayed inside the button.
- Show Icon: Enable this option to display an icon inside the button.
- Show Text: Enable this option to display text inside the button.
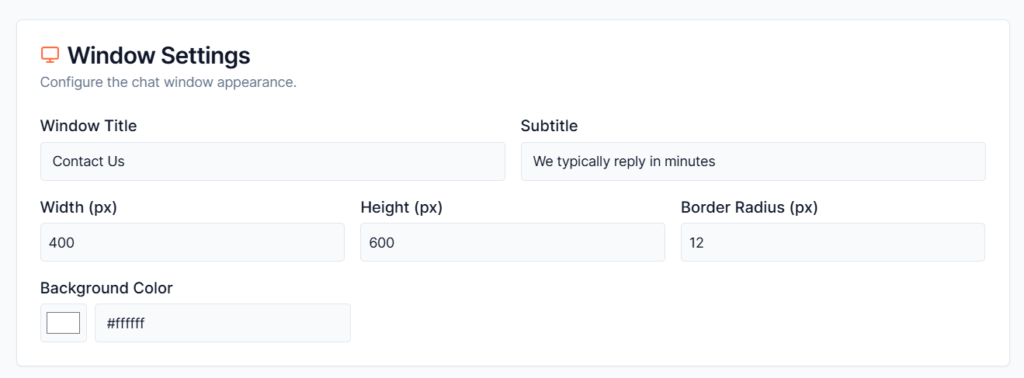
Window Settings #
Configure how the chat window box looks once a user clicks open your floating button.
- Window Title: Set the main title displayed at the top of the popup window.
- Subtitle: Add optional text below the window title.
- Width (px): Set the width of the popup window in pixels. Larger widths create a wider chat area.
- Height (px): Set the height of the popup window in pixels. Taller heights display more conversation content.
- Border Radius: Controls how rounded the popup window corners appear. Higher values create a softer and more modern appearance.
- Background Color: Choose the background color for the popup window.
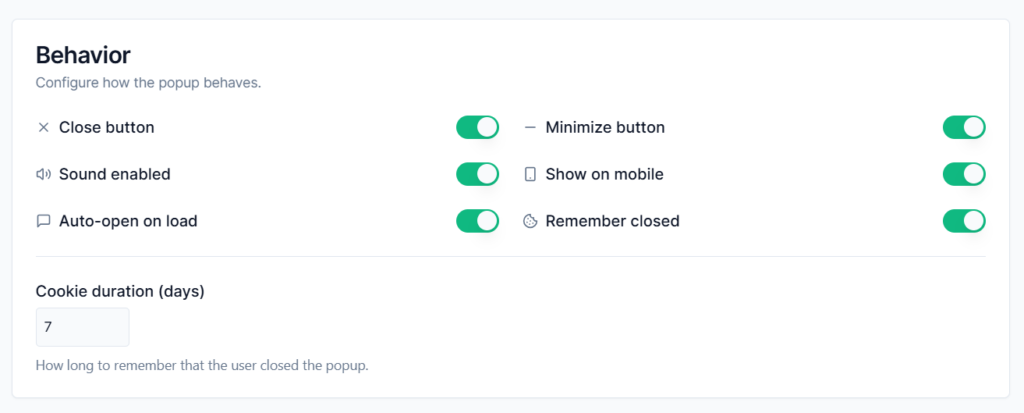
Behavior #
The Behavior settings control how the popup chat window behaves for visitors on your website.
- Close button: When turned on, an X icon appears in the top corner of the chat window so users can easily close the popup whenever they want.
- Minimize button: Displays a minimize button that lets users collapse the popup without fully closing it.
- Sound enabled: Plays notification sounds when the popup opens or receives new messages.
- Show on mobile: Displays the popup chat widget on mobile devices. Disable this option if you want to hide the popup on smaller screens.
- Auto-open on load: Automatically opens the popup when the page loads.
- Remember closed: When turned on, if a visitor explicitly clicks the close button, your website will remember their choice and stop popping the chat window open as they navigate to other pages on your site.
- Cookie duration (days): Set exactly how many days your website should remember a user’s choice to close the chat box (set to 7 days by default). During this timeframe, the automatic popup will stay quietly hidden for that specific visitor
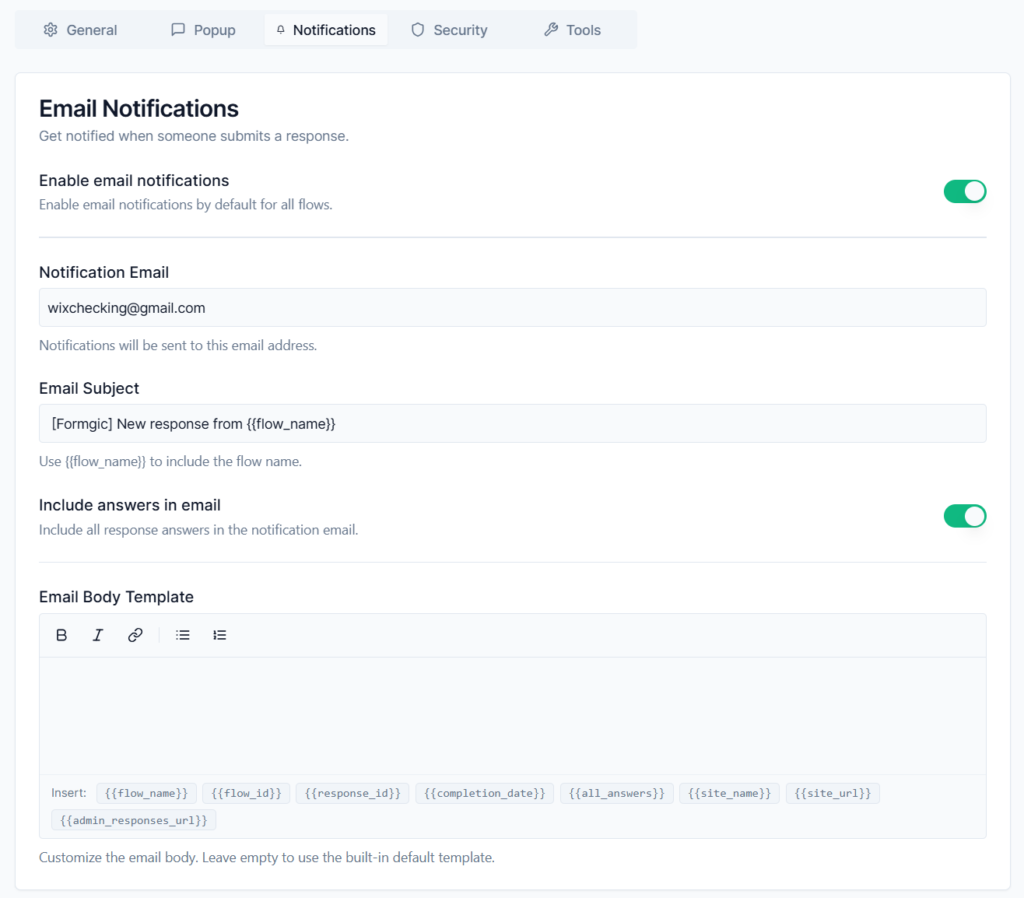
Notifications #
Never miss a lead or response! The Email Notifications settings panel lets you set up automatic email alerts, so you or your team get a beautifully formatted email the exact moment a visitor submits a response to any of your conversational flows.
- Enable email notifications : Turning this on enables email alerts by default for every single flow you build.
- Notification Email Type the target email address where all your alert notifications should be delivered
- Email Subject Customize the subject line of the notification emails so they stand out in your inbox. You can type text directly and use smart tags to keep things organized automatically
- Include Answers in Email: Enable this option to include all submitted answers directly inside the notification email.
- Email Body Template An open text area that lets you write and design your own custom layout for the notification email. If you prefer a completely hands-off setup, simply leave this field empty to use Formgic’s clean, built-in default template.
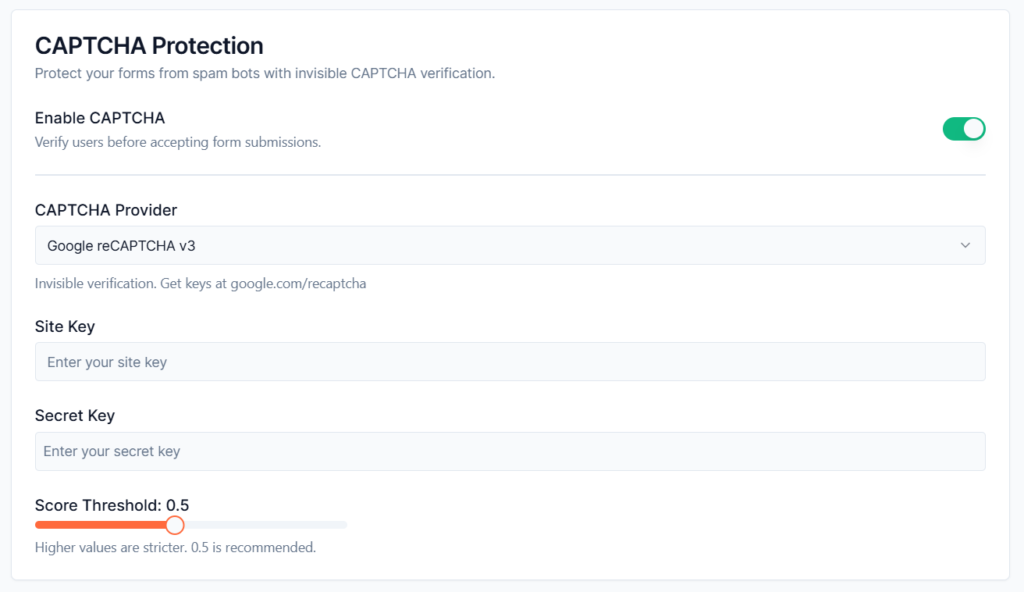
Security #
Protect your forms from automated spam, fake entries, and malicious bot submissions. The Security settings allow you to add invisible background verification checks so your dashboard stays clean and filled with real human responses.
CAPTCHA Provider: Formgic uses Google reCAPTCHA v3 to help secure your conversational flows. This system works invisibly in the background, allowing real users to complete forms smoothly without solving puzzles or clicking checkbox challenges.
Site Key: Paste your public Google reCAPTCHA Site Key here. This key is used to connect CAPTCHA verification to your website.
Secret Key: Paste your private Google reCAPTCHA Secret Key here. This key securely verifies submissions behind the scenes. If you do not already have your keys, you can generate them for free at: google.com/recaptcha
Score Threshold
Google reCAPTCHA v3 gives every visitor a score between:
- 0.0 → Likely a bot
- 1.0 → Likely a real human
The default value is: 0.5. This is the recommended balance for most websites.
- Higher values = Stricter spam protection
- Lower values = More relaxed verification
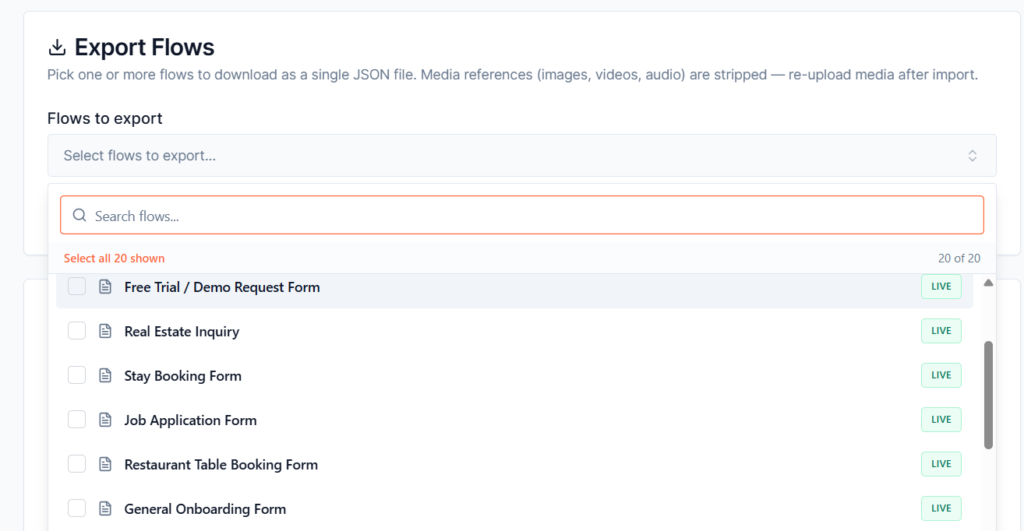
Tools #
The Tools section allows you to export and import forms, making it easy to back up your work, transfer flows between websites, or share them with other Formgic installations.
How to Export
- Select one or more flows from the dropdown list.
- Click Export Selected.
- Formgic will generate and download a JSON file containing the selected flows.
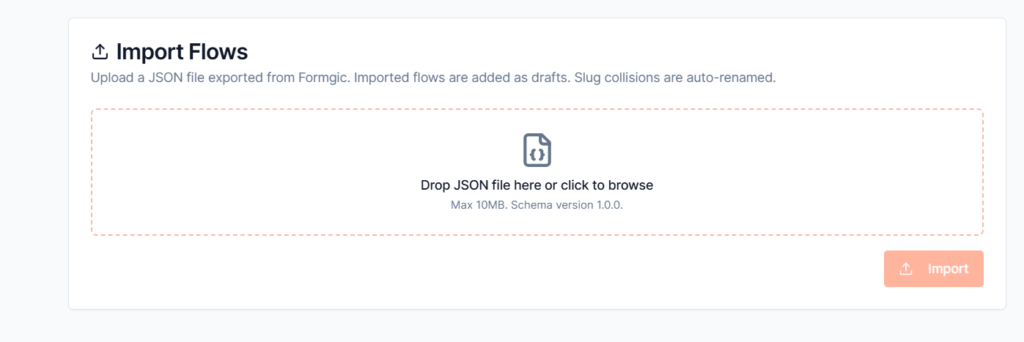
Import Flows
Use the Import Flows tool to upload previously exported Formgic flow files.
How to Import
- Click the drag and drop a JSON file.
- Select the exported Formgic flow file.
- Click Import.
The flow will be added to your website automatically.