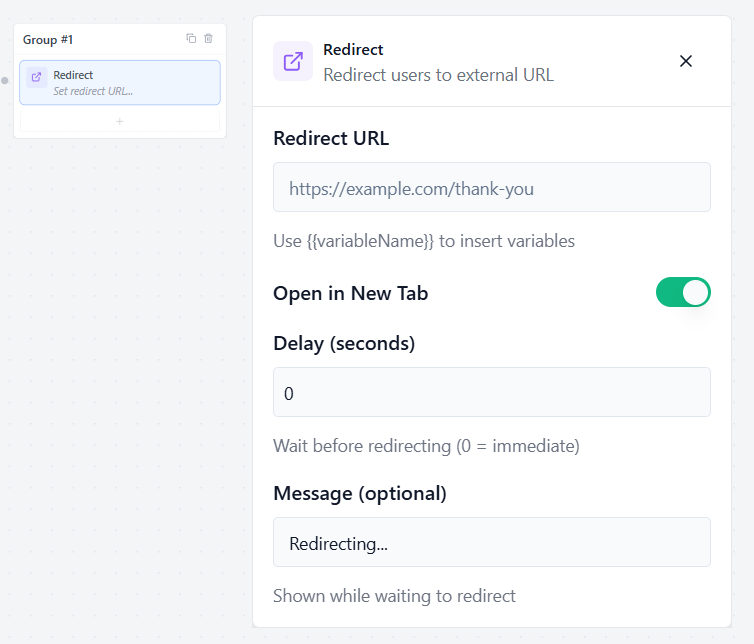
Redirect #
The Redirect block automatically forwards users to an external website or specific URL path at a designated point in your conversational flow.
Configuration Fields #
- Redirect URL Enter the full destination web address (e.g., https://example.com).
- Open in New Tab A toggle option, when enabled, the destination link launches safely in a fresh browser tab, keeping your current conversational form active in the background.
- Delay:
Set how many seconds to wait before redirecting the user.
- 0 = Redirect immediately
- 5 = Wait 5 seconds before redirecting
This is useful when showing a confirmation message before redirecting.
- Message (Optional)
Type a message to display while waiting for the redirect.
- Example: Redirecting…
- You can also use this area to show a thank-you message or instructions before the user leaves the chat.
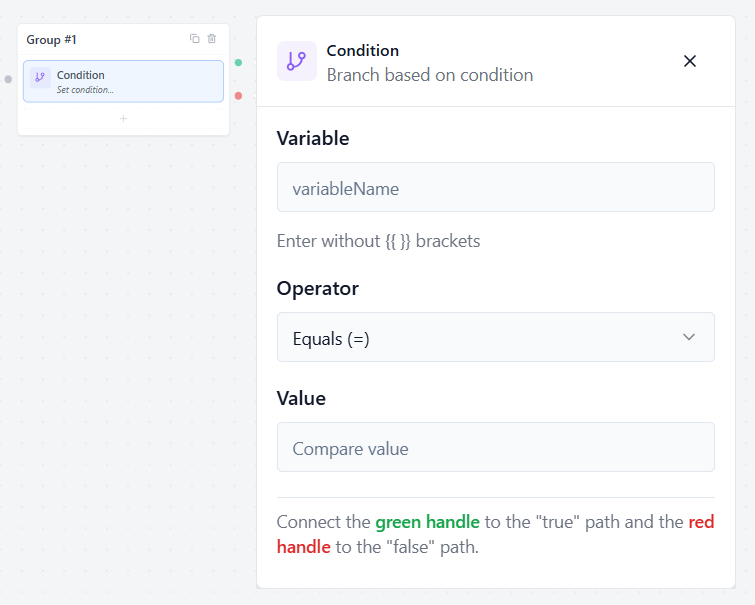
Condition #
The Condition block creates branching logic in your flow, allowing you to route users down different paths based on their answers.
Configuration Fields #
- Variable: Specify the variable you want to check. Enter the exact variable name without using {{ }} curly brackets (e.g., email or selections).
- Operator: Choose how the value should be compared.
Example:
- Equals (=)
- Not Equals (!=)
- Greater Than (>)
- Less Than (<)
Value: Enter the comparison value or criteria that the variable must meet to trigger the condition.
Visual Routing Rule #
The Condition block checks the variable value and automatically decides which path to follow.
- Green Handle = True path
- Red Handle = False path
Connect:
- The green handle to the flow that should run when the condition matches
- The red handle to the flow that should run when the condition does not match
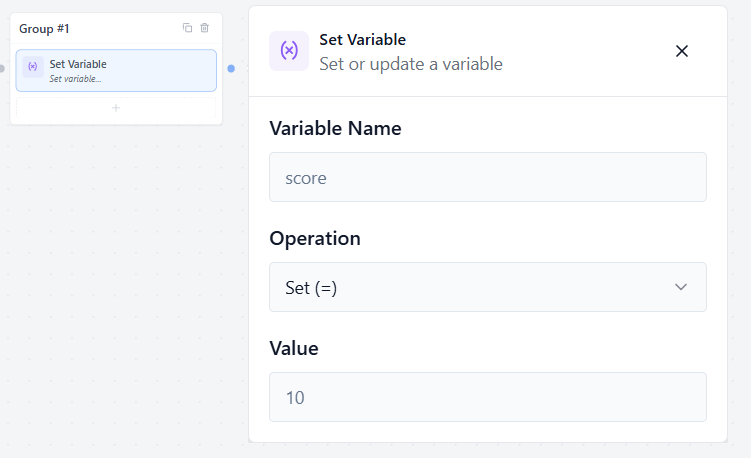
Set Variable: #
The Set Variable block allows you to silently create or update background values such as tracking a user’s quiz score or assigning data parameters at any specific point in your conversational flow.
Configuration Fields #
- Variable Name: Enter the custom name of the tracking variable you want to target or modify (e.g., score or status).
- Operation: Define how the backend should manipulate the value.
Choose how the variable should be updated.
Set (=) Replaces the current value completely.
Example: score = 5
Add (+) Adds a value to the existing variable.
Example: Current score = 2
Add 1 → New score = 3
Subtract (-) Subtracts a value from the existing variable.
Example: Current score = 5
Subtract 1 → New score = 4
Value: Enter the value you want to apply to the variable.
Calculation #
The Calculation Block uses values collected from previous input blocks to perform calculations. Each input block must have a unique Save to Variable name, which can then be referenced in the formula using double curly braces {{ }}.
Configuration Fields #
Available Variables #
Displays all variables collected from previous input blocks in the flow. These variables can be used in the Formula field to perform calculations. Each variable can be referenced in the formula using double curly braces.
Example:
{{principal}}, {{rate}}, {{months}}
Note: Only variables collected from blocks that appear before the Calculation block in the flow are available.
Formula #
Enter the mathematical expression you want to calculate. You can combine variables with supported operators and built-in functions.
Example:
{{price}} * {{quantity}}
EMI Calculation Example:
({{principal}} * ({{rate}} / 1200)) /
(1 – pow(1 + {{rate}} / 1200, -{{months}}))
Supported Operators #
The Calculation block supports the following operators:
- + Addition
- – Subtraction
- * Multiplication
- / Division
- % Modulus (Remainder)
- ^ Power (Exponent)
Supported Functions
The following built-in functions are available:
- round(number) – Rounds a number to the nearest whole number.
- floor(number) – Rounds a number down.
- ceil(number) – Rounds a number up.
- abs(number) – Returns the absolute value.
- sqrt(number) – Returns the square root.
- pow(base, exponent) – Raises a number to a specified power.
- min(value1, value2, …) – Returns the smallest value.
- max(value1, value2, …) – Returns the largest value.
- log(number) – Returns the natural logarithm.
- exp(number) – Returns e raised to the specified power.
- if(condition, then, else) – Returns one value if the condition is true and another if it is false.
Save Result to Variable
Specify a variable name to store the calculated result.
The saved value can be referenced later in your flow using: {{variable_name}}
For example, if the result is saved as: emi
It can be accessed later as: {{emi}}
If the Formula Can’t Be Calculated
Choose what value the Calculation block should return if the formula cannot be evaluated. #
This can happen when:
- A required variable is empty.
- A variable contains non-numeric text.
- The formula attempts to divide by zero.
- The formula contains an invalid expression.
Use a Fallback Value: Enter a default value to use when the calculation fails.
Example:
If the fallback value is set to 0, the Calculation block returns 0 instead of producing an error.
Skip — Continue, Show Nothing #
Skips the calculation and continues the flow without displaying or saving a result when the formula cannot be evaluated.
Use this option if you want the conversation to continue without interrupting the user when a calculation error occurs.
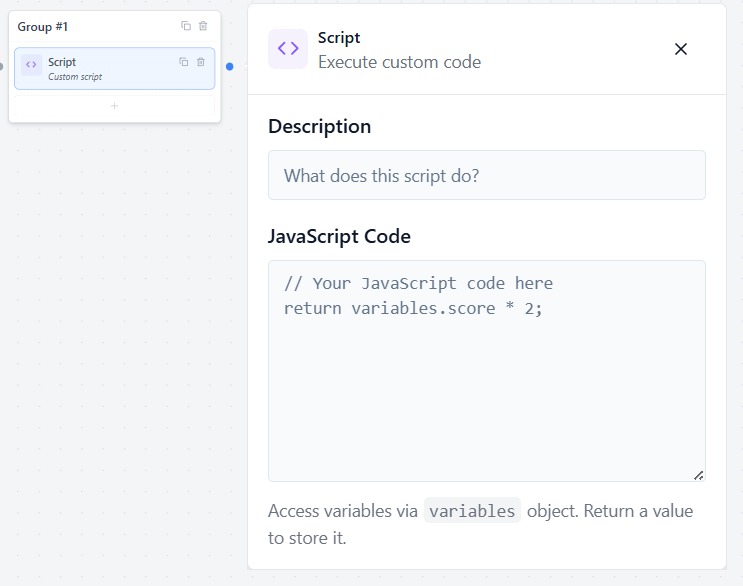
Script Block #
The Script block allows you to run custom JavaScript code inside your flow for advanced logic, calculations, formatting, or dynamic data handling.
Configuration Fields #
- Description Add an optional, internal note describing what this specific script does (e.g., “Format phone number string” or “Calculate custom discount”).
- JavaScript Code Write or paste your custom code directly into the editor field.
Accessing Variables & Storing Data #
- Read Data: Access any previously collected flow variables dynamically using the global variables object
- Save Data: Use a return statement at the end of your script to pass a value out of the code block and store it back into the flow’s current state.
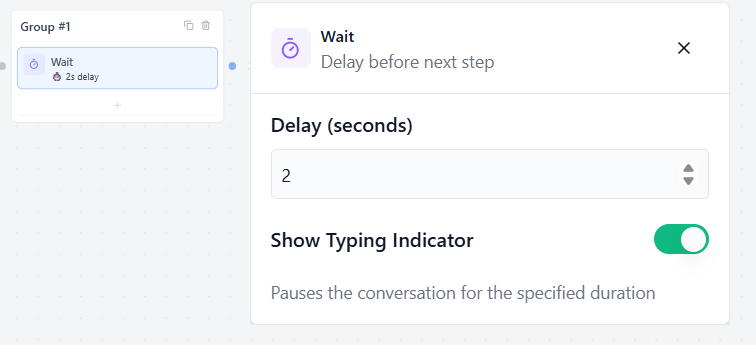
Wait Block #
The Wait block allows you to pause the conversation for a specific amount of time before continuing to the next step.
Delay #
Set how many seconds the flow should wait before moving to the next block.
Example:
- 0 = No delay
- 2 = Wait 2 seconds
- 5 = Wait 5 seconds
Show Typing Indicator #
Enable this option to display a typing animation while waiting. This makes the chatbot feel more natural and conversational during the delay period.
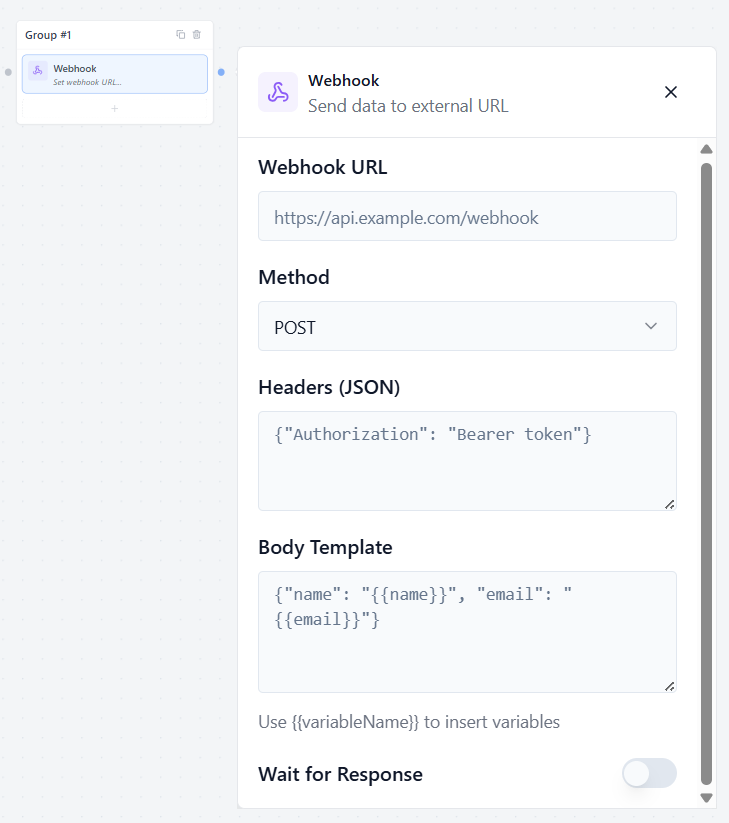
Webhook Block #
The Webhook block allows you to send collected form data to external applications, CRM systems, or automation tools like n8n and Zapier in real time.
Configuration Fields
Webhook URL: Enter the target API endpoint destination where the data payload should be delivered
Choose the HTTP request method used to communicate with the external API.
Common methods include:
- GET → Retrieve data from an external service
- POST → Send new data to an external service
- PUT → Update existing data
- DELETE → Remove existing data
POST is the most commonly used option for submitting form or chatbot data.
Headers (JSON) Add optional request headers in JSON format.
Body Template Define the data payload to send to the external service.
Wait for Response #
Enable this option if the flow should wait for the external server response before continuing.
Useful when:
- You need confirmation from the API
- You want to process returned data
- The next flow depends on the webhook result
Disable it if you want the flow to continue immediately without waiting.
Jump Block #
The Jump block lets you move the conversation directly to another group in your flow. This helps you reuse groups and keep your canvas clean and organized.
Configuration Fields #
- Jump to Group Click the dropdown menu to open a complete list of your existing groups, then Select a group… to define your target destination.
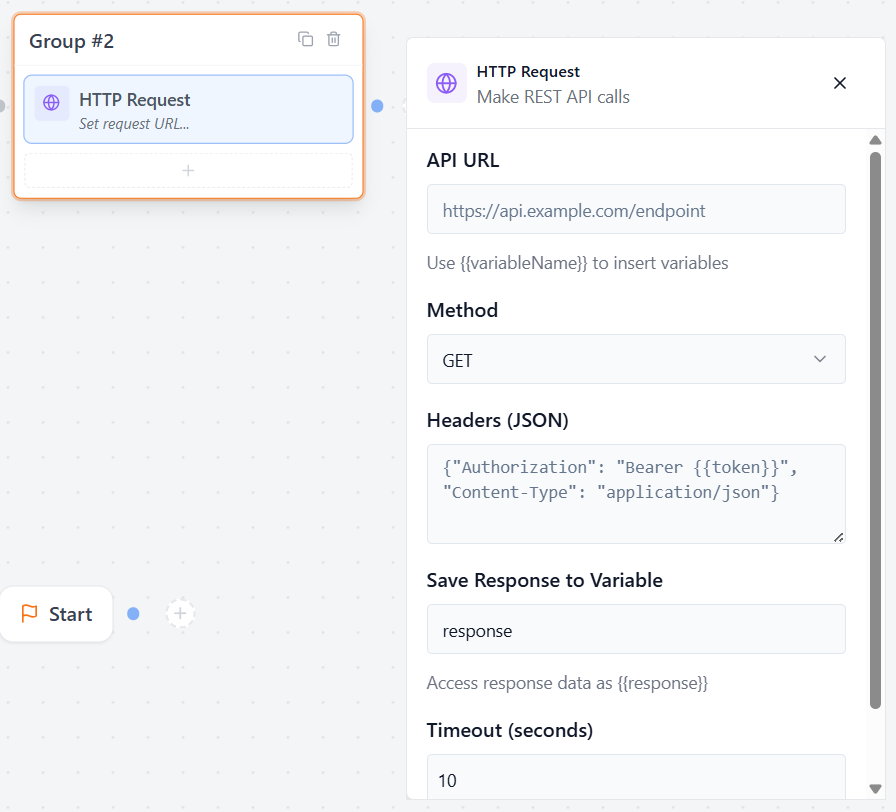
HTTP Request: #
The HTTP Request block allows you to make REST API calls inside your flow to fetch external data, send information, or connect with third-party services.
Configuration Fields #
API URL: Enter the API endpoint URL you want to connect to. #
- Method: Select the appropriate HTTP verbs for your request
- GET → Retrieve data
- POST → Send new data
- PUT → Update existing data
- PATCH → Partially update existing data
- DELETE → Remove data
Headers(JSON) – Add optional request headers in JSON format, such as API keys, authorization tokens, or content type settings.
{
“Content-Type”: “application/json”,
“X-API-Key”: “secret”
}
Save Response to Variable: Enter the variable name where the API response should be stored.
Example: response
Once saved, you can use the returned data later in your flow using: {{response}}
This can be used in:
- Text bubbles
- Conditions
- Scripts
- Other blocks
Timeout (seconds)
Set how long the flow should wait for the external server to respond before stopping the request.
Example:
- 5 = Wait up to 5 seconds
- 30 = Wait up to 30 seconds
Continue on Error
Enable this option if you want the flow to continue even when the API request fails.
For example:
- Server errors
- Invalid responses
- Connection issues
When enabled, the conversation will continue to the next block instead of stopping the flow.