Typing Emulation Settings #
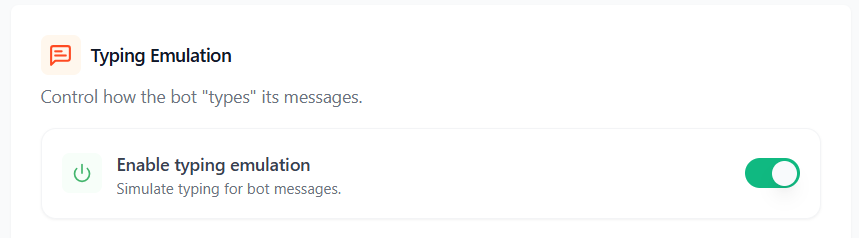
The Typing Emulation settings control how the chatbot typing animation behaves during the conversation. Instead of flashing text on the screen instantly, this setting simulates a real person typing out responses with natural pauses. This catches the user’s eye and keeps them engaged with the conversation.
Enable Typing Emulation: A simple on/off switch. When turned on, your bot will show a live typing animation like bouncing dots before displaying its messages, making the interaction feel like a real live chat.
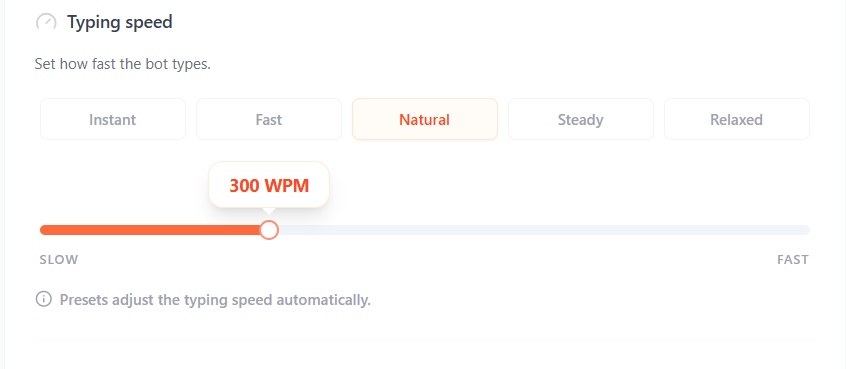
Typing Speed: Controls how fast the bot typing animation appears. Also you can also manually adjust the typing speed using the slider
Instant: Messages appear immediately with no typing delay.
Fast: Displays messages quickly for a faster conversation experience.
Natural: Simulates normal human typing speed for a balanced and realistic chat feel.
Steady: Slower typing speed that gives users more time to read each message comfortably.
Relaxed: The slowest typing speed, ideal for longer messages and calm conversational pacing.
Skip Typing Animation for First Message : Enable this option to display the first chatbot message instantly without showing the typing animation.

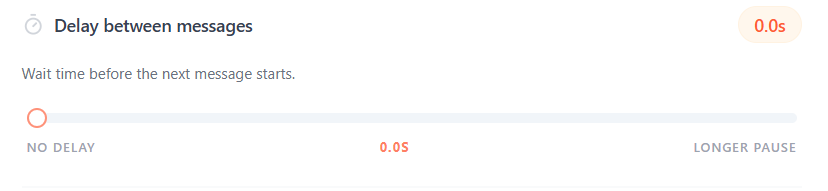
Delay between messages: Controls how long the chatbot waits before showing the next message.
No delay: Messages appear immediately one after another. Longer delays create a slower and more natural conversation flow.
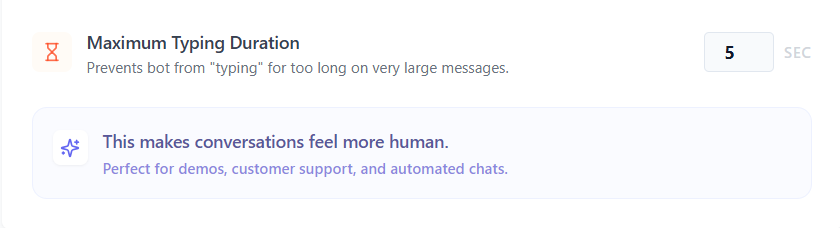
Maximum Typing Duration: Set the maximum amount of time the chatbot can show the typing animation for a single message
Example: 5 sec → The typing animation will stop after 5 seconds, even for long messages.
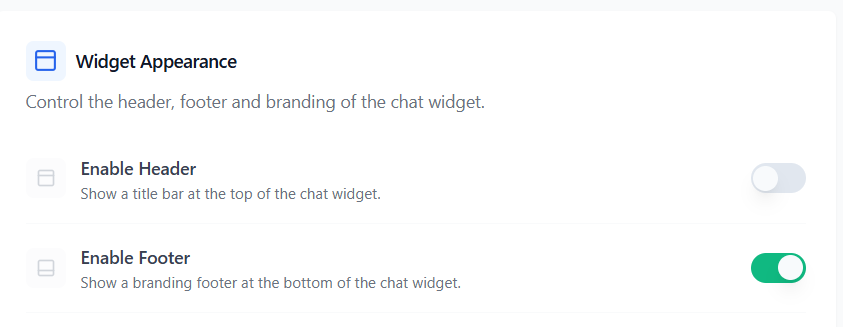
Widget Appearance: It lets you customize the outer frame of your chat widget. Here, you can control the top title bar, add your own custom branding links at the bottom, and choose exactly how typing fields and buttons behave on the screen.
Enable Header: When enabled, a clean title bar appears at the top of the chat widget and displays the title of your conversational form.
Enable Footer: When turned on, a small branding footer appears at the very bottom of the chat widget. This is perfect for displaying your company name or agency link.
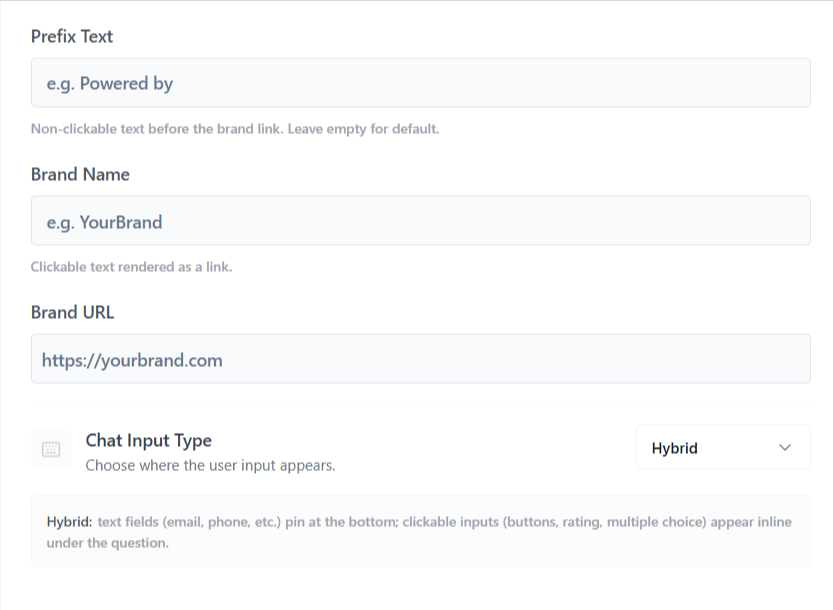
Prefix Text: The non-clickable text that comes right before your brand link (for example: “Powered by”). If you leave this empty, the system will use the standard default text.
Brand Name: The main text for your brand (for example: “YourBrand”). This text becomes a clickable link.
Brand URL: Add the website URL users will be redirected to when they click the Brand Name.
Chat Input Type: This dropdown lets you choose exactly where and how input fields appear when a user interacts with your chatbot. You can select from three different layouts depending on how you want your form to feel:
- Inline: In Inline mode, all questions and input fields appear directly inside the chat conversation. When the bot asks for information like: Name, Email, Message the input field appears right below the question bubble.
- Bottom: Bottom mode works like traditional chat apps such as WhatsApp or Messenger. Text input fields stay fixed at the bottom of the chat window, while clickable options appear inside the conversation.
- Hybrid: Hybrid mode automatically uses the best layout based on the input type.
- Clickable inputs (Buttons, Ratings, Multiple Choice) appear directly below the question
- Typing inputs (Email, Phone, Text fields) stay fixed at the bottom of the chat window
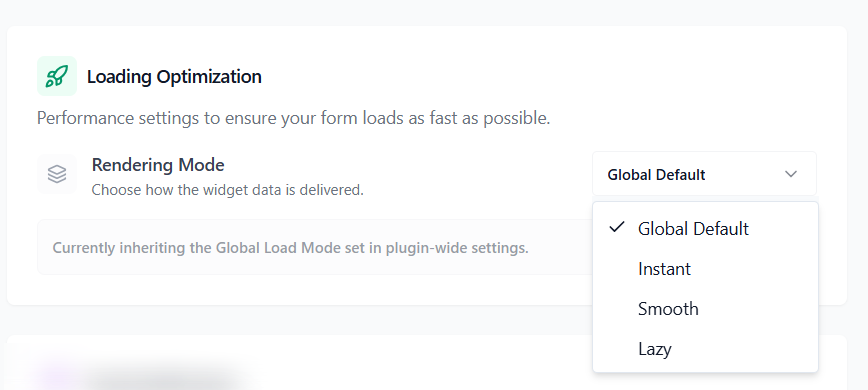
Load Optimization: Loading Optimization settings control how your chatbot loads on the page. These settings help improve performance and loading speed for your conversational forms,
Rendering Mode
Global Default: Uses the default loading mode configured in the main plugin settings. The flow will automatically inherit the plugin-wide loading settings.
Instant: Loads the chatbot immediately as soon as the page opens.
Smooth: Loads the chatbot smoothly with balanced performance and visual transitions.
Lazy: When turned on, the chatbot script will wait to load until the user actually scrolls down to the section of the page where the form is placed.
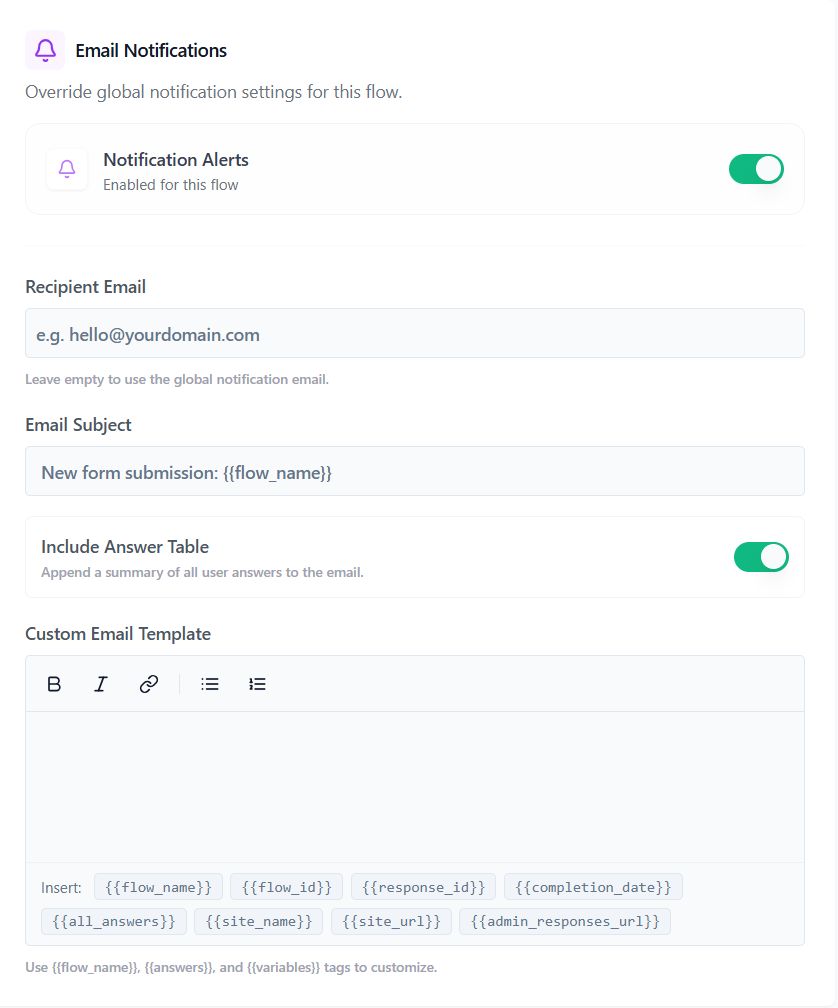
Email Notifications #
The Email Notification settings allow you to override the global notification settings for this specific flow. This is useful when you want submissions from a particular form to be sent to a different email address or use a custom email template.
Notification Alerts: Enable the toggle to receive email notifications whenever a new response is submitted to this flow
Recipient Email: Enter the email address where notifications should be sent. Leave this field empty to use the global notification email configured in Formgic Settings.
Email Subject: Customize the subject line of the notification email. You can use variables to dynamically display the flow name.
Include Answer Table: Enable this option to automatically include a summary table of all submitted answers inside the notification email. This makes it easy to review responses directly from your inbox.
Custom Email Template: Create your own custom email notification template. If left empty, Formgic will use the default email template automatically.